目录
最近项目需要引入一个算法服务,预测算法,需要做成接口的形式调用,复习一下fastapi 多看文档
路由
在 FastAPI 中,路由是通过装饰器来定义的。每个路由对应一个视图函数,视图函数可以处理 HTTP 请求并返回响应。
pythonfrom fastapi import FastAPI

app = FastAPI()

@app.get("/")
def read_root():
    return {"Hello": "World"}

@app.get("/items/{item_id}")
def read_item(item_id: int, q: str = None):
    return {"item_id": item_id, "q": q}
FastAPI 支持多种 HTTP 方法,包括:
@app.get("/")@app.post("/")@app.put("/")@app.delete("/")@app.options("/")@app.head("/")@app.patch("/")@app.trace("/")
示例
pythonfrom fastapi import FastAPI

app = FastAPI()

@app.get("/")
def read_root():
    return {"method": "GET"}

@app.post("/items/")
def create_item(item: dict):
    return {"item": item}

@app.put("/items/{item_id}")
def update_item(item_id: int, item: dict):
    return {"item_id": item_id, "item": item}

@app.delete("/items/{item_id}")
def delete_item(item_id: int):
    return {"item_id": item_id, "status": "deleted"}
参数
路径参数
路径参数是通过在 URL 中定义变量来捕获的。路径参数的类型可以通过类型提示来指定。
pythonfrom fastapi import FastAPI

app = FastAPI()

@app.get("/items/{item_id}")
def read_item(item_id: int):
    return {"item_id": item_id}
查询参数
查询参数是通过 URL 中的查询字符串传递的。查询参数可以通过函数参数来捕获,并且可以指定默认值。
pythonfrom fastapi import FastAPI

app = FastAPI()

@app.get("/items/")
def read_items(q: str = None):
    return {"q": q}
请求体
请求体可以通过 Pydantic 模型来定义和验证。Pydantic 模型可以自动生成 JSON 模式,并且 FastAPI 会自动处理请求体的解析和验证。
pythonfrom fastapi import FastAPI
from pydantic import BaseModel

app = FastAPI()

class Item(BaseModel):
    name: str
    description: str = None
    price: float
    tax: float = None

@app.post("/items/")
def create_item(item: Item):
    return item
模板
我们主要了解jinja模板引擎和fastapi结合,写前后端不分离应用,了解前后端交互和模板渲染
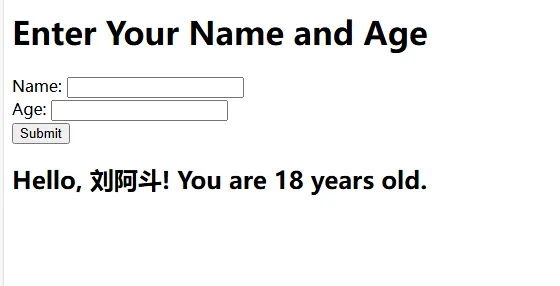
Form,从表单中获取数据
pyfrom fastapi import FastAPI, Request, Form
from fastapi.templating import Jinja2Templates
from fastapi.staticfiles import StaticFiles

app = FastAPI()

# 挂载静态文件目录
app.mount("/static", StaticFiles(directory="static"), name="static")

# 设置模板目录
templates = Jinja2Templates(directory="templates")

@app.get("/")
async def read_root(request: Request):
    return templates.TemplateResponse("index.html", {"request": request})

@app.post("/submit")
async def submit_form(request: Request, name: str = Form(...), age: int = Form(...)):
    # 拼接文本
    result_text = f"Hello, {name}! You are {age} years old."
    return templates.TemplateResponse("index.html", {"request": request, "result_text": result_text})


if __name__ == "__main__":
    import uvicorn
    uvicorn.run(app, host="0.0.0.0", port=8000)
模板代码
html<!DOCTYPE html>
<html lang="en">
  <head>
    <meta charset="UTF-8" />
    <meta name="viewport" content="width=device-width, initial-scale=1.0" />
    <title>FastAPI Form Example</title>
    <link href="{{ url_for('static', path='/styles.css') }}" rel="stylesheet" />
  </head>
  <body>
    <div class="back">
      <div class="content">
        <h1>Enter Your Name and Age</h1>
        <form action="/submit" method="post">
          <label for="name">Name:</label>
          <input type="text" id="name" name="name" required />
          <br />
          <label for="age">Age:</label>
          <input type="number" id="age" name="age" required />
          <br />
          <button type="submit">Submit</button>
        </form>
        <div >
          <h2>
            {% if result_text %}
                <h2>{{ result_text }}</h2>
            {% endif %}
          </h2>
        </div>
      </div>

    </div>


  </body>
</html>
从url获取参数
pyfrom fastapi import FastAPI, Request
from fastapi.templating import Jinja2Templates
from fastapi.staticfiles import StaticFiles

app = FastAPI()

# 挂载静态文件目录
app.mount("/static", StaticFiles(directory="static"), name="static")

# 设置模板目录
templates = Jinja2Templates(directory="templates")

@app.get("/")
async def read_root(request: Request):
    return templates.TemplateResponse("index.html", {"request": request})

@app.get("/submit")
async def submit_form(request: Request, name: str, age: int):
    # 拼接文本
    result_text = f"Hello, {name}! You are {age} years old."
    return templates.TemplateResponse("index.html", {"request": request, "result_text": result_text})


if __name__ == "__main__":
    import uvicorn
    uvicorn.run(app, host="0.0.0.0", port=8000)
模板
html<!DOCTYPE html>
<html lang="en">
<head>
    <meta charset="UTF-8">
    <meta name="viewport" content="width=device-width, initial-scale=1.0">
    <title>FastAPI URL Parameter Example</title>
    <link href="{{ url_for('static', path='/styles.css') }}" rel="stylesheet">
</head>
<body>
    <h1>Enter Your Name and Age</h1>
    <form id="form">
        <label for="name">Name:</label>
        <input type="text" id="name" name="name" required>
        <br>
        <label for="age">Age:</label>
        <input type="number" id="age" name="age" required>
        <br>
        <button type="submit">Submit</button>
    </form>

    {% if result_text %}
        <h2>{{ result_text }}</h2>
    {% endif %}

    <script>
        document.getElementById('form').addEventListener('submit', function(event) {
            event.preventDefault();
            const name = document.getElementById('name').value;
            const age = document.getElementById('age').value;
            const url = `/submit?name=${encodeURIComponent(name)}&age=${encodeURIComponent(age)}`;
            window.location.href = url;
        });
    </script>
</body>
</html>
登录lab
pyfrom fastapi import FastAPI, Request, Form, HTTPException
from fastapi.templating import Jinja2Templates
from fastapi.staticfiles import StaticFiles

app = FastAPI()

# 挂载静态文件目录
app.mount("/static", StaticFiles(directory="static"), name="static")

# 设置模板目录
templates = Jinja2Templates(directory="templates")

# 模拟用户数据库
users = {
    "user1": "password1",
    "user2": "password2"
}

@app.get("/")
async def read_root(request: Request):
    return templates.TemplateResponse("index.html", {"request": request})

@app.post("/login")
async def login(request: Request, username: str = Form(...), password: str = Form(...)):
    if username in users and users[username] == password:
        return templates.TemplateResponse("home.html", {"request": request, "username": username})
    else:
        raise HTTPException(status_code=401, detail="Invalid credentials")

@app.get("/welcome")
async def welcome(request: Request, username: str):
    return templates.TemplateResponse("home.html", {"request": request, "username": username})

if __name__ == "__main__":
    import uvicorn
    uvicorn.run("main:app", host="0.0.0.0", port=8000,reload=True,workers=2)
模板
index.html<!DOCTYPE html>
<html lang="en">
  <head>
    <meta charset="UTF-8" />
    <meta name="viewport" content="width=device-width, initial-scale=1.0" />
    <title>FastAPI URL Parameter Example</title>
    <link href="{{ url_for('static', path='/styles.css') }}" rel="stylesheet" />
  </head>
  <body>
    <div class="back">
      <div class="content">
        <h1>登陆页面</h1>
        <form action="/login" method="post">
          <label for="username">Username:</label>
          <input type="text" id="username" name="username" required />
          <br />
          <label for="password">Password:</label>
          <input type="password" id="password" name="password" required />
          <br />
          <button type="submit">Login</button>
        </form>
      </div>
    </div>
  </body>
</html>
// home.html
<!DOCTYPE html>
<html lang="en">
<head>
    <meta charset="UTF-8">
    <meta name="viewport" content="width=device-width, initial-scale=1.0">
    <title>FastAPI URL Parameter Example</title>
    <link href="{{ url_for('static', path='/styles.css') }}" rel="stylesheet">
</head>
<body>
    <div class="back">
        <div class="content">
            <h1>欢迎来到主页!{{username}}</h1>

        </div>
    </div>
</body>
</html>
用AJAX
pyfrom fastapi import FastAPI, Request
from fastapi.templating import Jinja2Templates
from fastapi.staticfiles import StaticFiles
from typing import List

app = FastAPI()

# 挂载静态文件目录
app.mount("/static", StaticFiles(directory="static"), name="static")

# 设置模板目录
templates = Jinja2Templates(directory="templates")

# 模拟用户数据库
users = [
    {"id": 1, "name": "Alice", "email": "alice@example.com"},
    {"id": 2, "name": "Bob", "email": "bob@example.com"},
    {"id": 3, "name": "Charlie", "email": "charlie@example.com"}
]

@app.get("/")
async def read_root(request: Request):
    return templates.TemplateResponse("index.html", {"request": request})

@app.get("/api/users")
async def get_users() -> List[dict]:
    return users

if __name__ == "__main__":
    import uvicorn
    uvicorn.run(app, host="0.0.0.0", port=8000)
模板
py<!DOCTYPE html>
<html lang="en">
<head>
    <meta charset="UTF-8">
    <meta name="viewport" content="width=device-width, initial-scale=1.0">
    <title>User List</title>
    <link href="{{ url_for('static', path='/styles.css') }}" rel="stylesheet">
</head>
<body>
    <h1>User List</h1>
    <button id="fetch-users">Fetch Users</button>
    <ul id="user-list"></ul>

    <script>
        document.getElementById('fetch-users').addEventListener('click', function() {
            fetch('/api/users')
                .then(response => response.json())
                .then(users => {
                    const userList = document.getElementById('user-list');
                    userList.innerHTML = ''; // 清空列表
                    users.forEach(user => {
                        const li = document.createElement('li');
                        li.textContent = `${user.name} (${user.email})`;
                        userList.appendChild(li);
                    });
                });
        });
    </script>
</body>
</html>
响应
Response
Response 是 FastAPI 中最基本的响应类型,你可以使用它来返回任意类型的数据。你可以手动设置响应的状态码、头信息等。
pythonfrom fastapi import FastAPI, Response

app = FastAPI()

@app.get("/custom_response")
def custom_response():
    content = {"message": "Hello, World!"}
    headers = {"X-Custom-Header": "Custom-Value"}
    return Response(content=content, status_code=200, headers=headers)
JSONResponse
JSONResponse 是 FastAPI 中最常用的响应类型之一,它将 Python 对象转换为 JSON 格式的字符串,并返回给客户端。
pythonfrom fastapi import FastAPI
from fastapi.responses import JSONResponse

app = FastAPI()

@app.get("/json_response")
def json_response():
    content = {"message": "Hello, World!"}
    return JSONResponse(content=content)
HTMLResponse
HTMLResponse 用于返回 HTML 内容。你可以直接返回 HTML 字符串。
pythonfrom fastapi import FastAPI
from fastapi.responses import HTMLResponse

app = FastAPI()

@app.get("/html_response")
def html_response():
    html_content = """
    <html>
        <head>
            <title>Hello, World!</title>
        </head>
        <body>
            <h1>Hello, World!</h1>
        </body>
    </html>
    """
    return HTMLResponse(content=html_content)
PlainTextResponse
PlainTextResponse 用于返回纯文本内容。
pythonfrom fastapi import FastAPI
from fastapi.responses import PlainTextResponse

app = FastAPI()

@app.get("/text_response")
def text_response():
    return PlainTextResponse(content="Hello, World!")
RedirectResponse
RedirectResponse 用于重定向到另一个 URL。
示例
pythonfrom fastapi import FastAPI
from fastapi.responses import RedirectResponse

app = FastAPI()

@app.get("/redirect")
def redirect():
    return RedirectResponse(url="https://www.example.com")
FileResponse
FileResponse 用于返回文件内容。你可以指定文件路径,FastAPI 会自动处理文件的读取和传输。
示例
pythonfrom fastapi import FastAPI
from fastapi.responses import FileResponse

app = FastAPI()

@app.get("/download_file")
def download_file():
    file_path = "path/to/your/file.txt"
    return FileResponse(path=file_path, filename="file.txt")
StreamingResponse
StreamingResponse 用于流式传输数据。你可以使用它来处理大文件或实时数据流。
示例
pythonfrom fastapi import FastAPI
from fastapi.responses import StreamingResponse

app = FastAPI()

@app.get("/stream_data")
def stream_data():
    def generate():
        for i in range(10):
            yield f"data: {i}\n\n"
    return StreamingResponse(generate(), media_type="text/event-stream")
UJSONResponse
UJSONResponse 使用 ujson 库来序列化 JSON 数据,ujson 是一个更快的 JSON 序列化库。
示例
pythonfrom fastapi import FastAPI
from fastapi.responses import UJSONResponse

app = FastAPI()

@app.get("/ujson_response")
def ujson_response():
    content = {"message": "Hello, World!"}
    return UJSONResponse(content=content)
ORJSONResponse
ORJSONResponse 使用 orjson 库来序列化 JSON 数据,orjson 是另一个更快的 JSON 序列化库。
示例
pythonfrom fastapi import FastAPI
from fastapi.responses import ORJSONResponse

app = FastAPI()

@app.get("/orjson_response")
def orjson_response():
    content = {"message": "Hello, World!"}
    return ORJSONResponse(content=content)
异步
FastAPI 支持异步,适合处理 I/O 密集型任务。异步视图函数使用 async def 定义。
pythonfrom fastapi import FastAPI
import asyncio

app = FastAPI()

@app.get("/async_items/")
async def read_async_items():
    await asyncio.sleep(1)
    return {"message": "This is an async response"}
路由组织
FastAPI 支持通过子应用(SubApplications)来组织路由。子应用可以有自己的路由和中间件。
pythonfrom fastapi import FastAPI

app = FastAPI()

@app.get("/")
def read_root():
    return {"Hello": "World"}

subapi = FastAPI()

@subapi.get("/sub")
def read_sub():
    return {"message": "This is a sub API"}

app.mount("/subapi", subapi)
API文档
FastAPI 自动生成 API 文档(Swagger UI 和 ReDoc),方便开发者测试和调试。
pythonfrom fastapi import FastAPI

app = FastAPI()

@app.get("/items/{item_id}")
def read_item(item_id: int, q: str = None):
    return {"item_id": item_id, "q": q}

# 访问 http://127.0.0.1:8000/docs 查看 Swagger UI
# 访问 http://127.0.0.1:8000/redoc 查看 ReDoc
include_router组织路由
使用 include_router 的基本步骤
- 创建路由模块:在不同的模块中定义路由。
- 创建主应用:在主应用中使用
include_router方法将路由模块包含进来。
示例
假设我们有一个简单的博客应用程序,包含用户管理、文章管理和评论管理三个部分。我们可以使用 include_router 来组织这些功能。
目录结构
myapp/
    __init__.py
    main.py
    routers/
        __init__.py
        users.py
        articles.py
        comments.py
myapp/main.py
pythonfrom fastapi import FastAPI
from .routers import users, articles, comments

app = FastAPI()

app.include_router(users.router)
app.include_router(articles.router)
app.include_router(comments.router)
myapp/routers/users.py
pythonfrom fastapi import APIRouter

router = APIRouter()

@router.get("/users/")
def read_users():
    return {"message": "This is the users router"}

@router.get("/users/{user_id}")
def read_user(user_id: int):
    return {"user_id": user_id}
myapp/routers/articles.py
pythonfrom fastapi import APIRouter

router = APIRouter()

@router.get("/articles/")
def read_articles():
    return {"message": "This is the articles router"}

@router.get("/articles/{article_id}")
def read_article(article_id: int):
    return {"article_id": article_id}
myapp/routers/comments.py
pythonfrom fastapi import APIRouter

router = APIRouter()

@router.get("/comments/")
def read_comments():
    return {"message": "This is the comments router"}

@router.get("/comments/{comment_id}")
def read_comment(comment_id: int):
    return {"comment_id": comment_id}
路由前缀和标签
你可以为每个路由模块指定前缀和标签,以便更好地组织和管理路由。
示例
pythonfrom fastapi import FastAPI
from .routers import users, articles, comments

app = FastAPI()

app.include_router(users.router, prefix="/api/v1", tags=["users"])
app.include_router(articles.router, prefix="/api/v1", tags=["articles"])
app.include_router(comments.router, prefix="/api/v1", tags=["comments"])
路由模块的依赖注入
你可以在路由模块中定义依赖注入,并在主应用中使用 include_router 时传递依赖。
示例
myapp/routers/users.py:
pythonfrom fastapi import APIRouter, Depends

router = APIRouter()

def get_db():
    return "database_connection"

@router.get("/users/")
def read_users(db: str = Depends(get_db)):
    return {"message": "This is the users router", "db": db}

@router.get("/users/{user_id}")
def read_user(user_id: int, db: str = Depends(get_db)):
    return {"user_id": user_id, "db": db}
myapp/main.py:
pythonfrom fastapi import FastAPI
from .routers import users, articles, comments

app = FastAPI()

app.include_router(users.router, prefix="/api/v1", tags=["users"])
app.include_router(articles.router, prefix="/api/v1", tags=["articles"])
app.include_router(comments.router, prefix="/api/v1", tags=["comments"])
自定义中间件
鉴权中间件
pythonfrom fastapi import FastAPI, Request, HTTPException
from fastapi.responses import JSONResponse

app = FastAPI()

@app.middleware("http")
async def authenticate_user(request: Request, call_next):
    try:
        if "Authorization" not in request.headers:
            raise HTTPException(status_code=401, detail="未提供身份验证凭据")
        response = await call_next(request)
        return response
    except HTTPException as e:
        # 捕获 HTTPException 并返回自定义响应
        return JSONResponse(status_code=e.status_code, content={"detail": e.detail})

@app.get("/")
async def read_root():
    return {"Hello": "World"}


if __name__ == "__main__":
    import uvicorn
    uvicorn.run(app, host="127.0.0.1", port=8000)
计算耗时中间件
python@app.middleware("http")
async def add_process_time_header(request: Request, call_next):
    start_time = time.time()
    response = await call_next(request)
    process_time = time.time() - start_time
    response.headers["X-Process-Time"] = str(process_time)
    return response
中间件作用域 上面的中间件作用域都是app所有的路由,中间件作用域控制跟路由差不多
路由中间件
pyfrom fastapi import FastAPI, Request, APIRouter
import time

app = FastAPI()

# 定义一个路由组
router = APIRouter()

@router.middleware("http")
async def add_process_time_header(request: Request, call_next):
    start_time = time.time()
    response = await call_next(request)
    process_time = time.time() - start_time
    response.headers["X-Process-Time"] = str(process_time)
    return response

@router.get("/protected")
async def protected_route():
    return {"message": "This is a protected route"}

# 将路由组添加到主应用

app.include_router(router)

@app.get("/")
async def read_root():
    return {"Hello": "World"}

@app.get("/items/{item_id}")
async def read_item(item_id: int):
    return {"item_id": item_id}
单路由作用域 只作用于一个路由的中间件,我们可以用依赖来实现 关于依赖项可以看官方文档这里
py
from fastapi import FastAPI, Request, HTTPException, status,Header,Depends

from fastapi.responses import JSONResponse

app = FastAPI()

@app.middleware("http")
async def catch_exceptions_middleware(request: Request, call_next):
    try:
        response = await call_next(request)
        return response
    except HTTPException as e:
        # 捕获 HTTPException 并返回自定义响应
        return JSONResponse(status_code=e.status_code, content={"detail": e.detail})
    except Exception as e:
        # 捕获其他异常并返回 500 错误
        return JSONResponse(status_code=500, content={"detail": "Internal Server Error"})

def check_authorization(authorization: str = Header(None)):
    if not authorization:
        raise HTTPException(
            status_code=status.HTTP_401_UNAUTHORIZED,
            detail="未提供身份验证凭据",
            headers={"WWW-Authenticate": "Bearer"},
        )
    return authorization

@app.get("/items/")
async def read_items(authorization: str = Depends(check_authorization)):
    return {"items": ["item1", "item2"], "authorization": authorization}

if __name__ == "__main__":
    import uvicorn

    uvicorn.run(app, host="0.0.0.0", port=8000)
全局异常捕获
pythonfrom fastapi import FastAPI, HTTPException, Request
from fastapi.responses import JSONResponse

app = FastAPI()

# 自定义异常类
class CustomException(Exception):
    def __init__(self, status_code: int, detail: str):
        self.status_code = status_code
        self.detail = detail

# 全局异常处理器
@app.exception_handler(CustomException)
async def custom_exception_handler(request: Request, exc: CustomException):
    return JSONResponse(
        status_code=exc.status_code,
        content={"detail": exc.detail},
    )

# 全局异常处理器
@app.exception_handler(HTTPException)
async def http_exception_handler(request: Request, exc: HTTPException):
    return JSONResponse(
        status_code=exc.status_code,
        content={"detail": exc.detail},
    )

# 全局异常处理器
@app.exception_handler(Exception)
async def generic_exception_handler(request: Request, exc: Exception):
    return JSONResponse(
        status_code=500,
        content={"detail": "Internal Server Error"},
    )

# 模拟下层抛出异常
def simulate_error(error_type: str):
    if error_type == "400":
        raise HTTPException(status_code=400, detail="Bad Request")
    elif error_type == "401":
        raise HTTPException(status_code=401, detail="Unauthorized")
    elif error_type == "403":
        raise HTTPException(status_code=403, detail="Forbidden")
    elif error_type == "404":
        raise HTTPException(status_code=404, detail="Not Found")
    elif error_type == "500":
        raise CustomException(status_code=500, detail="Internal Server Error")
    else:
        raise Exception("Unknown Error")

# 路由
@app.get("/error/{error_type}")
async def trigger_error(error_type: str):
    simulate_error(error_type)
    return {"message": "This should not be returned"}

if __name__ == "__main__":
    import uvicorn

    uvicorn.run(app, host="0.0.0.0", port=8000)
后台任务
pyfrom fastapi import BackgroundTasks, FastAPI

app = FastAPI()

# 假的推送消息方法
def fake_push_to_queue(message: str):
    print(f"Pushing message to queue: {message}")

@app.post("/payment")
async def process_payment(background_tasks: BackgroundTasks):
    # 模拟支付处理逻辑
    payment_result = "Payment processed successfully"

    # 创建后台任务,将消息推送到消息队列
    background_tasks.add_task(fake_push_to_queue, payment_result)

    return {"message": "Payment request received", "status": "processing"}

if __name__ == "__main__":
    import uvicorn

    uvicorn.run(app, host="0.0.0.0", port=8000)
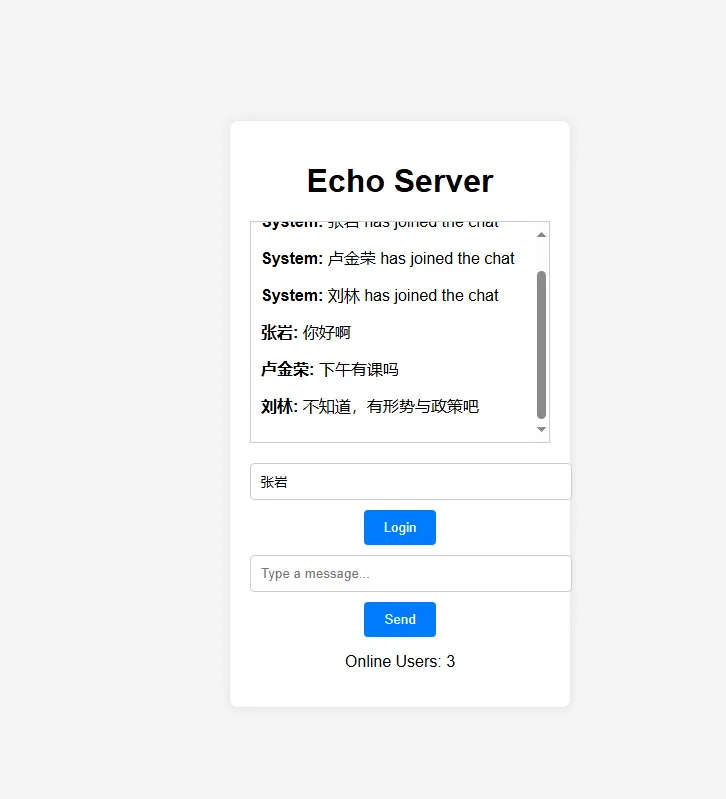
WebSocket
接下来给出一个websocket demo程序,多人聊天室,文档
pyfrom fastapi import FastAPI, WebSocket, WebSocketDisconnect
from fastapi.responses import HTMLResponse
from fastapi.staticfiles import StaticFiles
from fastapi.templating import Jinja2Templates
from starlette.requests import Request

app = FastAPI()

# 挂载静态文件目录
app.mount("/static", StaticFiles(directory="static"), name="static")

# 使用 Jinja2 模板引擎
templates = Jinja2Templates(directory="templates")

# 存储所有连接的 WebSocket 和用户名
active_connections = {}

@app.get("/")
async def get(request: Request):
    return templates.TemplateResponse("index.html", {"request": request})

@app.websocket("/ws")
async def websocket_endpoint(websocket: WebSocket):
    await websocket.accept()
    username = None
    try:
        while True:
            data = await websocket.receive_text()
            if data.startswith("login:"):
                username = data.split(":", 1)[1]
                active_connections[websocket] = username
                response = {"username": "System", "msg": f"{username} has joined the chat", "online_count": len(active_connections)}
                for connection in active_connections:
                    await connection.send_json(response)
            else:
                if username:
                    response = {"username": username, "msg": data, "online_count": len(active_connections)}
                    for connection in active_connections:
                        await connection.send_json(response)
                else:
                    await websocket.send_json({"username": "System", "msg": "Please login first", "online_count": len(active_connections)})
    except WebSocketDisconnect:
        if username:
            del active_connections[websocket]
            response = {"username": "System", "msg": f"{username} has left the chat", "online_count": len(active_connections)}
            for connection in active_connections:
                await connection.send_json(response)

# 启动应用
if __name__ == "__main__":
    import uvicorn
    uvicorn.run(app, host="0.0.0.0", port=8000)
html<!DOCTYPE html>
<html lang="en">
<head>
    <meta charset="UTF-8">
    <meta name="viewport" content="width=device-width, initial-scale=1.0">
    <title>Echo Server</title>
    <link rel="stylesheet" href="{{ url_for('static', path='/styles.css') }}">
</head>
<body>
    <div class="container">
        <h1>Echo Server</h1>
        <div id="messages"></div>
        <input type="text" id="usernameInput" placeholder="Enter your username...">
        <button id="loginButton" onclick="login()">Login</button>
        <input type="text" id="messageInput" placeholder="Type a message..." disabled>
        <button id="sendButton" onclick="sendMessage()" disabled>Send</button>
        <p>Online Users: <span id="onlineCount">0</span></p>
    </div>

    <script>
        let ws;

        function login() {
            const username = document.getElementById("usernameInput").value;
            if (username.trim() === "") {
                alert("Please enter a username");
                return;
            }

            ws = new WebSocket("ws://localhost:8000/ws");

            ws.onopen = function() {
                ws.send(`login:${username}`);
                messageInput.disabled = false;
                sendButton.disabled = false;
            };

            ws.onmessage = function(event) {
                const data = JSON.parse(event.data);
                const messages = document.getElementById("messages");
                const onlineCount = document.getElementById("onlineCount");

                messages.innerHTML += `<p><strong>${data.username}:</strong> ${data.msg}</p>`;
                onlineCount.innerText = data.online_count;
            };

            ws.onclose = function() {
                alert("Connection closed");
                messageInput.disabled = true;
                sendButton.disabled = true;
            };
        }

        function sendMessage() {
            const input = document.getElementById("messageInput");
            ws.send(input.value);
            input.value = "";
        }
    </script>
</body>
</html>
cssbody {
    font-family: Arial, sans-serif;
    background-color: #f4f4f4;
    display: flex;
    justify-content: center;
    align-items: center;
    height: 100vh;
    margin: 0;
}

.container {
    background-color: #fff;
    padding: 20px;
    border-radius: 8px;
    box-shadow: 0 0 10px rgba(0, 0, 0, 0.1);
    width: 300px;
    text-align: center;
}

input {
    width: 100%;
    padding: 10px;
    margin: 10px 0;
    border: 1px solid #ccc;
    border-radius: 4px;
}

button {
    padding: 10px 20px;
    background-color: #007bff;
    color: #fff;
    border: none;
    border-radius: 4px;
    cursor: pointer;
}

button:hover {
    background-color: #0056b3;
}

#messages {
    text-align: left;
    border: 1px solid #ccc;
    padding: 10px;
    margin-bottom: 10px;
    height: 200px;
    overflow-y: scroll;
}
事件
FastAPI支持两个生命周期事件,start_up,shoutdown时间可以在应用生命周期开始和结束时做一些处理
pyfrom fastapi import FastAPI
import asyncio

app = FastAPI()

# 模拟的数据库
items = {}

# 启动事件处理器
@app.on_event("startup")
async def startup_event():
    # 模拟初始化数据库
    items["foo"] = {"name": "Fighters"}
    items["bar"] = {"name": "Tenders"}
    with open("log.txt", mode="a") as log:
        log.write("Application startup\n")
    print("Application startup complete")

# 关闭事件处理器
@app.on_event("shutdown")
def shutdown_event():
    # 模拟记录关闭日志
    with open("log.txt", mode="a") as log:
        log.write("Application shutdown\n")
    print("Application shutdown complete")

# 路由
@app.get("/items/{item_id}")
async def read_items(item_id: str):
    return items[item_id]

# 启动应用
if __name__ == "__main__":
    import uvicorn
    uvicorn.run(app, host="0.0.0.0", port=8000)
配置管理
config.py
pyfrom functools import lru_cache
from pydantic_settings import BaseSettings
class Settings(BaseSettings):
    app_name: str = "Awesome API"
    admin_email: str
    items_per_user: int = 50

    class Config:
        env_file = ".env"
        env_file_encoding = "utf-8"


@lru_cache
def get_settings():
    return Settings()
app.py
pyfrom fastapi import FastAPI, Depends

from typing import Annotated
from config import get_settings
from config import Settings

app = FastAPI()


@app.get("/info")
async def info(settings: Annotated[Settings, Depends(get_settings)]):
    return {
        "app_name": settings.app_name,
        "admin_email": settings.admin_email,
        "items_per_user": settings.items_per_user,
    }

# 启动应用
if __name__ == "__main__":
    import uvicorn
    uvicorn.run(app, host="0.0.0.0", port=8000)
数据库操作
基础入门
我推荐用SqlModel作为fastapi搭配的ORM,这是fastapi作者专门写的ORM,下面是一个简单的示例
pyfrom typing import Optional
from fastapi import FastAPI
from sqlmodel import Field, Session, SQLModel, create_engine,select
from pydantic import BaseModel
from typing import Any


class Hero(SQLModel, table=True):
    id: Optional[int] = Field(default=None, primary_key=True)
    name: str
    secret_name: str
    age: Optional[int] = None

class Result(BaseModel):
    msg:str
    code:int
    data:Optional[Any] = None

hero_1 = Hero(name="Deadpond", secret_name="Dive Wilson")
hero_2 = Hero(name="Spider-Boy", secret_name="Pedro Parqueador")
hero_3 = Hero(name="Rusty-Man", secret_name="Tommy Sharp", age=48)


engine = create_engine("sqlite:///database.db")


SQLModel.metadata.create_all(engine)

with Session(engine) as session:
    session.add(hero_1)
    session.add(hero_2)
    session.add(hero_3)
    session.commit()

app = FastAPI()


@app.get("/heroes/")
async def read_heroes():
    with Session(engine) as session:
        heroes = session.exec(select(Hero)).all()
    return Result(msg="ok",code=200,data=heroes)


if __name__ == "__main__":
    import uvicorn
    uvicorn.run(app, host="0.0.0.0", port=8000)
模型定义
pythonfrom typing import Optional
from sqlmodel import Field, SQLModel

class Hero(SQLModel, table=True):
    id: Optional[int] = Field(default=None, primary_key=True)
    name: str
    secret_name: str
    age: Optional[int] = None
default
指定字段的默认值。如果没有提供值,将使用该默认值。
pythonage: Optional[int] = Field(default=None)
primary_key
指定该字段是否为主键。主键字段在数据库中是唯一的,并且不能为空。
pythonid: Optional[int] = Field(default=None, primary_key=True)
nullable
指定该字段是否可以为空。默认为 True。
pythonage: Optional[int] = Field(nullable=True)
index
指定该字段是否为索引。索引可以加快查询速度。
pythonname: str = Field(index=True)
unique
指定该字段是否为唯一。唯一字段在数据库中是唯一的。
pythonsecret_name: str = Field(unique=True)
foreign_key
指定该字段为外键。外键用于建立表之间的关系。
pythonteam_id: int = Field(foreign_key="team.id")
sa_column
指定 SQLAlchemy 列的额外参数。可以用于设置 SQLAlchemy 特定的列属性。
pythonage: Optional[int] = Field(sa_column=Column(Integer, default=None))
description
为字段添加描述,通常用于文档生成。
pythonname: str = Field(description="The name of the hero")
alias
为字段指定别名,通常用于序列化和反序列化。
pythonsecret_name: str = Field(alias="secretName")
title
为字段指定标题,通常用于文档生成。
pythonname: str = Field(title="Hero Name")
max_length
指定字符串字段的最大长度。
pythonname: str = Field(max_length=50)
min_length
指定字符串字段的最小长度。
pythonname: str = Field(min_length=3)
regex
指定字符串字段的正则表达式验证。
pythonname: str = Field(regex=r"^[A-Za-z]+$")
gt
指定数值字段的最小值(大于)。
pythonage: int = Field(gt=0)
ge
指定数值字段的最小值(大于等于)。
pythonage: int = Field(ge=18)
lt
指定数值字段的最大值(小于)。
pythonage: int = Field(lt=100)
le
指定数值字段的最大值(小于等于)。
pythonage: int = Field(le=99)
multiple_of
指定数值字段必须是某个数的倍数。
pythonage: int = Field(multiple_of=5)
allow_mutation
指定字段是否允许修改。默认为 True。
pythonname: str = Field(allow_mutation=False)
repr
指定字段是否包含在模型的 __repr__ 方法中。默认为 True。
pythonname: str = Field(repr=False)
示例
下面是一个综合示例,演示如何使用 Field 的各种参数:
pythonfrom typing import Optional
from sqlmodel import Field, SQLModel

class Hero(SQLModel, table=True):
    id: Optional[int] = Field(default=None, primary_key=True)
    name: str = Field(max_length=50, index=True, description="The name of the hero")
    secret_name: str = Field(unique=True, title="Secret Identity")
    age: Optional[int] = Field(nullable=True, gt=0, lt=100, description="The age of the hero")
    team_id: Optional[int] = Field(foreign_key="team.id", nullable=True)
索引定义
索引可以通过 Field 的 index 参数来定义。index 参数用于指定某个字段是否为索引。当 index 参数设置为 True 时,该字段将被创建为数据库表的索引。
下面是一个示例
pythonfrom typing import Optional
from sqlmodel import Field, SQLModel

class Hero(SQLModel, table=True):
    id: Optional[int] = Field(default=None, primary_key=True)
    name: str = Field(index=True)  # 定义 name 字段为索引
    secret_name: str
    age: Optional[int] = None
在这个示例中,name 字段被定义为索引
复合索引是指在多个字段上创建的索引。在 SQLModel 中,复合索引可以通过 SQLModel 的 __table_args__ 属性来定义。
下面是一个示例
pythonfrom typing import Optional
from sqlmodel import Field, SQLModel
from sqlalchemy import Index

class Hero(SQLModel, table=True):
    id: Optional[int] = Field(default=None, primary_key=True)
    name: str
    secret_name: str
    age: Optional[int] = None

    __table_args__ = (
        Index("idx_name_secret_name", "name", "secret_name"),  # 定义复合索引
    )
在这个示例中,idx_name_secret_name 是一个复合索引,它包含 name 和 secret_name 两个字段。
唯一索引是指索引字段的值必须是唯一的。在 SQLModel 中,唯一索引可以通过 Field 的 unique 参数来定义。
下面是一个示例
pythonfrom typing import Optional
from sqlmodel import Field, SQLModel

class Hero(SQLModel, table=True):
    id: Optional[int] = Field(default=None, primary_key=True)
    name: str = Field(index=True)
    secret_name: str = Field(unique=True)  # 定义 secret_name 字段为唯一索引
    age: Optional[int] = None
基础查询
异步
sqlmodel是基于 Pydantic and SQLAlchemy.的,现在实现一部还需要借助SQLALchemy来实现
pyfrom typing import Optional
from fastapi import FastAPI, HTTPException
from sqlmodel import Field, SQLModel, select
from sqlalchemy.ext.asyncio import create_async_engine, AsyncSession
from sqlalchemy.orm import sessionmaker
from pydantic import BaseModel
from typing import Any

# 定义模型
class Hero(SQLModel, table=True):
    id: Optional[int] = Field(default=None, primary_key=True)
    name: str
    secret_name: str
    age: Optional[int] = None

# 定义返回结果模型
class Result(BaseModel):
    msg: str
    code: int
    data: Optional[Any] = None

# 创建异步数据库引擎
DATABASE_URL = "sqlite+aiosqlite:///database.db"
engine = create_async_engine(DATABASE_URL, echo=True)

# 创建异步会话工厂
async_session = sessionmaker(
    bind=engine,
    class_=AsyncSession,
    expire_on_commit=False,
)

# 创建 FastAPI 应用
app = FastAPI()

# 初始化数据库
@app.on_event("startup")
async def startup():
    async with engine.begin() as conn:
        await conn.run_sync(SQLModel.metadata.create_all)

# 关闭数据库连接
@app.on_event("shutdown")
async def shutdown():
    await engine.dispose()

# 插入示例数据
@app.on_event("startup")
async def insert_data():
    hero_1 = Hero(name="Deadpond", secret_name="Dive Wilson")
    hero_2 = Hero(name="Spider-Boy", secret_name="Pedro Parqueador")
    hero_3 = Hero(name="Rusty-Man", secret_name="Tommy Sharp", age=48)

    async with async_session() as session:
        session.add(hero_1)
        session.add(hero_2)
        session.add(hero_3)
        await session.commit()

# 获取所有英雄数据
@app.get("/heroes/", response_model=Result)
async def read_heroes():
    async with async_session() as session:
        result = await session.execute(select(Hero))
        heroes = result.scalars().all()
        return Result(msg="ok", code=200, data=heroes)

# 获取单个英雄数据
@app.get("/heroes/{hero_id}", response_model=Result)
async def read_hero(hero_id: int):
    async with async_session() as session:
        hero = await session.get(Hero, hero_id)
        if not hero:
            raise HTTPException(status_code=404, detail="Hero not found")
        return Result(msg="ok", code=200, data=hero)

# 创建英雄数据
@app.post("/heroes/", response_model=Result)
async def create_hero(hero: Hero):
    async with async_session() as session:
        session.add(hero)
        await session.commit()
        await session.refresh(hero)
        return Result(msg="ok", code=200, data=hero)

# 更新英雄数据
@app.put("/heroes/{hero_id}", response_model=Result)
async def update_hero(hero_id: int, hero: Hero):
    async with async_session() as session:
        db_hero = await session.get(Hero, hero_id)
        if not db_hero:
            raise HTTPException(status_code=404, detail="Hero not found")
        hero_data = hero.dict(exclude_unset=True)
        for key, value in hero_data.items():
            setattr(db_hero, key, value)
        await session.commit()
        await session.refresh(db_hero)
        return Result(msg="ok", code=200, data=db_hero)

# 删除英雄数据
@app.delete("/heroes/{hero_id}", response_model=Result)
async def delete_hero(hero_id: int):
    async with async_session() as session:
        hero = await session.get(Hero, hero_id)
        if not hero:
            raise HTTPException(status_code=404, detail="Hero not found")
        await session.delete(hero)
        await session.commit()
        return Result(msg="ok", code=200, data=None)

# 启动应用
if __name__ == "__main__":
    import uvicorn
    uvicorn.run(app, host="0.0.0.0", port=8000)
封装模块
pyfrom sqlalchemy.ext.asyncio import create_async_engine, AsyncSession
from sqlalchemy.orm import sessionmaker
from sqlmodel import SQLModel

DATABASE_URL = "sqlite+aiosqlite:///database.db"

engine = create_async_engine(DATABASE_URL, echo=True)

async_session = sessionmaker(
    bind=engine,
    class_=AsyncSession,
    expire_on_commit=False,
)

async def init_db():
    async with engine.begin() as conn:
        await conn.run_sync(SQLModel.metadata.create_all)

async def get_session() -> AsyncSession:
    async with async_session() as session:
        yield session
Pydantic
基础入门
基础类型
Pydantic 支持 Python 标准库中的大多数类型,例如 int、float、str、bool、list、dict 等。你可以在模型字段上使用这些类型进行数据验证。
pythonfrom pydantic import BaseModel

class User(BaseModel):
    id: int
    name: str
    age: int
    is_active: bool
    scores: list[float]
    metadata: dict[str, str]
类型操作
Pydantic 提供了一些类型操作,用于在数据验证时进行更复杂的检查。
Optional
Optional 用于表示字段可以为 None。
pythonfrom typing import Optional

class User(BaseModel):
    id: int
    name: str
    age: Optional[int] = None
Union
Union 用于表示字段可以是多种类型之一。
pythonfrom typing import Union

class User(BaseModel):
    id: int
    name: str
    age: Union[int, float]
List
List 用于表示字段是一个列表。
pythonfrom typing import List

class User(BaseModel):
    id: int
    name: str
    scores: List[float]
Dict
Dict 用于表示字段是一个字典。
pythonfrom typing import Dict

class User(BaseModel):
    id: int
    name: str
    metadata: Dict[str, str]
Tuple
Tuple 用于表示字段是一个元组。
pythonfrom typing import Tuple

class User(BaseModel):
    id: int
    name: str
    coordinates: Tuple[float, float]
泛型
Pydantic 支持泛型,使得你可以定义更通用的模型。
GenericModel
GenericModel 是 Pydantic 提供的泛型模型基类。你可以使用它来定义泛型模型。
pythonfrom pydantic import BaseModel, GenericModel
from typing import TypeVar, Generic

T = TypeVar('T')

class Response(GenericModel, Generic[T]):
    code: int
    message: str
    data: T

class User(BaseModel):
    id: int
    name: str
    age: int

user_response = Response[User](code=200, message="Success", data=User(id=1, name="Alice", age=30))
print(user_response)
TypeVar
TypeVar 用于定义泛型类型变量。
pythonfrom typing import TypeVar, Generic

T = TypeVar('T')

class Box(Generic[T]):
    def __init__(self, content: T):
        self.content = content

box_of_ints = Box[int](content=123)
box_of_strs = Box[str](content="hello")
验证参数
Pydantic 提供了丰富的验证参数,可以在模型字段上使用这些参数进行数据验证。
max_length和min_length
用于验证字符串字段的最大和最小长度。
pythonfrom pydantic import BaseModel, Field

class User(BaseModel):
    id: int
    name: str = Field(max_length=50, min_length=3)
gt、ge、lt、le
用于验证数值字段的最小值和最大值。
pythonfrom pydantic import BaseModel, Field

class User(BaseModel):
    id: int
    name: str
    age: int = Field(gt=0, lt=100)
regex
用于验证字符串字段是否匹配正则表达式。
pythonfrom pydantic import BaseModel, Field

class User(BaseModel):
    id: int
    name: str = Field(regex=r"^[A-Za-z]+$")
multiple_of
用于验证数值字段是否是某个数的倍数。
pythonfrom pydantic import BaseModel, Field

class User(BaseModel):
    id: int
    name: str
    age: int = Field(multiple_of=5)
综合示例
pythonfrom typing import Optional, Union, List, Dict, Tuple, TypeVar, Generic
from pydantic import BaseModel, Field, GenericModel

# 基础类型
class User(BaseModel):
    id: int
    name: str
    age: Optional[int] = None
    is_active: bool
    scores: List[float]
    metadata: Dict[str, str]
    coordinates: Tuple[float, float]

# 类型操作
class UserWithUnion(BaseModel):
    id: int
    name: str
    age: Union[int, float]

# 泛型
T = TypeVar('T')

class Response(GenericModel, Generic[T]):
    code: int
    message: str
    data: T

class UserResponse(Response[User]):
    pass

# 验证参数
class UserWithValidation(BaseModel):
    id: int
    name: str = Field(max_length=50, min_length=3)
    age: int = Field(gt=0, lt=100)
    email: str = Field(regex=r"^[a-zA-Z0-9_.+-]+@[a-zA-Z0-9-]+\.[a-zA-Z0-9-.]+$")

# 示例数据
user = User(
    id=1,
    name="Alice",
    age=30,
    is_active=True,
    scores=[95.5, 88.0, 92.5],
    metadata={"role": "admin", "department": "engineering"},
    coordinates=(37.7749, -122.4194)
)

user_with_union = UserWithUnion(
    id=2,
    name="Bob",
    age=25.5
)

user_response = UserResponse(
    code=200,
    message="Success",
    data=user
)

user_with_validation = UserWithValidation(
    id=3,
    name="Charlie",
    age=28,
    email="charlie@example.com"
)

# 输出
print(user)
print(user_with_union)
print(user_response)
print(user_with_validation)
泛型演示
前面写了一个案例,是封装响应体的案例,我们用的Any,者可以满足我们的需求,但是真正优雅,还是需要用泛型,对的,就是泛型(有类型写的就是爽) 下面是一个案例
pyfrom typing import Optional,List
from fastapi import FastAPI, HTTPException
from sqlmodel import Field, SQLModel, select
from sqlalchemy.ext.asyncio import create_async_engine, AsyncSession
from sqlalchemy.orm import sessionmaker
from sqlalchemy import Column, String
from pydantic import BaseModel
from pydantic.generics import GenericModel

from typing import TypeVar, Generic
from typing import Any

# 定义模型
class Hero(SQLModel, table=True):
    id: Optional[int] = Field(default=None, primary_key=True)
    name: str
    secret_name: str
    age: Optional[int]


T = TypeVar('T')

class Result(GenericModel, Generic[T]):
    code: int
    msg: str
    data: T


# 创建异步数据库引擎
DATABASE_URL = "sqlite+aiosqlite:///database.db"
engine = create_async_engine(DATABASE_URL, echo=True)

# 创建异步会话工厂
async_session = sessionmaker(
    bind=engine,
    class_=AsyncSession,
    expire_on_commit=False,
)

# 创建 FastAPI 应用
app = FastAPI()

# 初始化数据库
@app.on_event("startup")
async def startup():
    async with engine.begin() as conn:
        await conn.run_sync(SQLModel.metadata.create_all)

# 关闭数据库连接
@app.on_event("shutdown")
async def shutdown():
    await engine.dispose()

# 插入示例数据
@app.on_event("startup")
async def insert_data():
    hero_1 = Hero(name="Deadpond", secret_name="Dive Wilson")
    hero_2 = Hero(name="Spider-Boy", secret_name="Pedro Parqueador")
    hero_3 = Hero(name="Rusty-Man", secret_name="Tommy Sharp", age=48)

    async with async_session() as session:
        session.add(hero_1)
        session.add(hero_2)
        session.add(hero_3)
        await session.commit()

# 获取所有英雄数据
@app.get("/heroes/", response_model=Result[List[Hero]])

async def read_heroes():
    async with async_session() as session:
        result = await session.execute(select(Hero))
        heroes = result.scalars().all()
        print(heroes)
        return Result(msg="ok", code=200, data=heroes)


# 启动应用
if __name__ == "__main__":
    import uvicorn
    uvicorn.run(app, host="0.0.0.0", port=8000)
更多的泛型示例
示例 1: 打印泛型模型
pythonfrom typing import TypeVar, Generic
from pydantic import BaseModel, ValidationError

T = TypeVar('T', bound=BaseModel)

def print_model(model: T):
    print(model)

class User(BaseModel):
    id: int
    name: str
    age: int

user = User(id=1, name="Alice", age=30)
print_model(user)
示例 2: 验证泛型模型
pythonfrom typing import TypeVar, Generic
from pydantic import BaseModel, ValidationError

T = TypeVar('T', bound=BaseModel)

def validate_model(model: T) -> T:
    try:
        return model.validate(model.dict())
    except ValidationError as e:
        print(f"Validation error: {e}")
        return None

class User(BaseModel):
    id: int
    name: str
    age: int

user = User(id=1, name="Alice", age=30)
validated_user = validate_model(user)
print(validated_user)
示例 3: 创建泛型模型
pythonfrom typing import TypeVar, Generic
from pydantic import BaseModel, ValidationError

T = TypeVar('T', bound=BaseModel)

def create_model(model_class: T, **kwargs) -> T:
    try:
        return model_class(**kwargs)
    except ValidationError as e:
        print(f"Validation error: {e}")
        return None

class User(BaseModel):
    id: int
    name: str
    age: int

user = create_model(User, id=1, name="Alice", age=30)
print(user)
- 泛型类示例
示例 1: 泛型存储类
pythonfrom typing import TypeVar, Generic, List
from pydantic import BaseModel

T = TypeVar('T', bound=BaseModel)

class Storage(Generic[T]):
    def __init__(self):
        self.items: List[T] = []

    def add_item(self, item: T):
        self.items.append(item)

    def get_items(self) -> List[T]:
        return self.items

class User(BaseModel):
    id: int
    name: str
    age: int

user_storage = Storage[User]()
user_storage.add_item(User(id=1, name="Alice", age=30))
user_storage.add_item(User(id=2, name="Bob", age=25))
print(user_storage.get_items())
示例 2: 泛型响应类
pythonfrom typing import TypeVar, Generic
from pydantic import BaseModel

T = TypeVar('T', bound=BaseModel)

class Response(Generic[T]):
    def __init__(self, code: int, message: str, data: T):
        self.code = code
        self.message = message
        self.data = data

    def __str__(self):
        return f"Response(code={self.code}, message={self.message}, data={self.data})"

class User(BaseModel):
    id: int
    name: str
    age: int

user = User(id=1, name="Alice", age=30)
response = Response[User](code=200, message="Success", data=user)
print(response)
- 泛型函数与泛型类的结合
示例 1: 泛型存储与泛型响应
pythonfrom typing import TypeVar, Generic, List
from pydantic import BaseModel

T = TypeVar('T', bound=BaseModel)

class Storage(Generic[T]):
    def __init__(self):
        self.items: List[T] = []

    def add_item(self, item: T):
        self.items.append(item)

    def get_items(self) -> List[T]:
        return self.items

class Response(Generic[T]):
    def __init__(self, code: int, message: str, data: T):
        self.code = code
        self.message = message
        self.data = data

    def __str__(self):
        return f"Response(code={self.code}, message={self.message}, data={self.data})"

class User(BaseModel):
    id: int
    name: str
    age: int

def get_storage_response(storage: Storage[T]) -> Response[List[T]]:
    return Response[List[T]](code=200, message="Success", data=storage.get_items())

user_storage = Storage[User]()
user_storage.add_item(User(id=1, name="Alice", age=30))
user_storage.add_item(User(id=2, name="Bob", age=25))
response = get_storage_response(user_storage)
print(response)
简单示例
pyfrom typing import TypeVar, Generic, List
from pydantic import BaseModel

T = TypeVar('T', bound=BaseModel)

def Add(a: T, b: T) -> T:
    return a + b


print(Add(1, 2))

print(Add(1.1, 2.2))

print(Add("1", "2"))
现代泛型必须具备的一个特性就是约束,这个是绕不开的
pythonfrom typing import TypeVar, Generic
from pydantic import BaseModel

T = TypeVar('T', bound=BaseModel)

class Response(Generic[T]):
    def __init__(self, code: int, message: str, data: T):
        self.code = code
        self.message = message
        self.data = data

    def __str__(self):
        return f"Response(code={self.code}, message={self.message}, data={self.data})"

class User(BaseModel):
    id: int
    name: str
    age: int

user = User(id=1, name="Alice", age=30)
response = Response[User](code=200, message="Success", data=user)
print(response)
在这个示例中,T 被约束为 BaseModel 的子类。这意味着 Response 类的 data 字段只能接受 BaseModel 的子类实例。
约束泛型类型为特定类型的子类
pythonfrom typing import TypeVar, Generic
from pydantic import BaseModel

class Animal(BaseModel):
    name: str

class Dog(Animal):
    breed: str

class Cat(Animal):
    color: str

T = TypeVar('T', bound=Animal)

class AnimalResponse(Generic[T]):
    def __init__(self, code: int, message: str, data: T):
        self.code = code
        self.message = message
        self.data = data

    def __str__(self):
        return f"AnimalResponse(code={self.code}, message={self.message}, data={self.data})"

dog = Dog(name="Buddy", breed="Golden Retriever")
cat = Cat(name="Whiskers", color="Black")

dog_response = AnimalResponse[Dog](code=200, message="Success", data=dog)
cat_response = AnimalResponse[Cat](code=200, message="Success", data=cat)

print(dog_response)
print(cat_response)
约束泛型类型为多个类型的联合
pythonfrom typing import TypeVar, Generic, Union
from pydantic import BaseModel

class User(BaseModel):
    id: int
    name: str
    age: int

class Product(BaseModel):
    id: int
    name: str
    price: float

T = TypeVar('T', User, Product)

class GenericResponse(Generic[T]):
    def __init__(self, code: int, message: str, data: T):
        self.code = code
        self.message = message
        self.data = data

    def __str__(self):
        return f"GenericResponse(code={self.code}, message={self.message}, data={self.data})"

user = User(id=1, name="Alice", age=30)
product = Product(id=1, name="Laptop", price=999.99)

user_response = GenericResponse[User](code=200, message="Success", data=user)
product_response = GenericResponse[Product](code=200, message="Success", data=product)

print(user_response)
print(product_response)
在这个示例中,T 被约束为 User 或 Product。这意味着 GenericResponse 类的 data 字段只能接受 User 或 Product 类型的实例。
Rabbitmq
接下来演示用aio_pika写操作rabbitmq
使用默认交换机发送消息
pyimport asyncio
import aio_pika

async def produce_message():
    # 连接到RabbitMQ服务器
    connection = await aio_pika.connect_robust("amqp://guest:guest@127.0.0.1/")

    # 创建一个通道并启用 confirm 模式
    channel = await connection.channel(publisher_confirms=True)

    # 声明一个队列
    queue = await channel.declare_queue('test_queue', durable=True)

    # 发送消息
    message_body = "Hello, RabbitMQ!"
    await channel.default_exchange.publish(
        aio_pika.Message(
            body=message_body.encode(),
            delivery_mode=aio_pika.DeliveryMode.PERSISTENT  # 持久化消息
        ),
        routing_key=queue.name,
    )
    print(f" [x] Sent {message_body}")

    # 关闭连接
    await connection.close()

asyncio.run(produce_message())
收到消息并确认
pyimport asyncio
import aio_pika

async def on_message(message: aio_pika.IncomingMessage):
    async with message.process():
        print(f" [x] Received {message.body.decode()}")
        # 手动确认消息
        await message.ack()

async def consume_message():
    # 连接到RabbitMQ服务器
    connection = await aio_pika.connect_robust("amqp://guest:guest@127.0.0.1/")

    # 创建一个通道
    channel = await connection.channel()

    # 声明一个队列
    queue = await channel.declare_queue('test_queue', durable=True)

    # 开始消费消息
    await queue.consume(on_message)

    print(" [*] Waiting for messages. To exit press CTRL+C")
    await asyncio.Future()  # 保持消费者运行

asyncio.run(consume_message())
生命各种类型交换机
pyimport asyncio
import aio_pika

async def declare_exchanges():
    # 连接到RabbitMQ服务器
    connection = await aio_pika.connect_robust("amqp://guest:guest@127.0.0.1/")

    # 创建一个通道
    channel = await connection.channel()

    # 声明一个 direct 类型的交换机
    direct_exchange = await channel.declare_exchange('direct_exchange', aio_pika.ExchangeType.DIRECT)
    print(" [x] Direct exchange declared")

    # 声明一个 fanout 类型的交换机
    fanout_exchange = await channel.declare_exchange('fanout_exchange', aio_pika.ExchangeType.FANOUT)
    print(" [x] Fanout exchange declared")

    # 声明一个 topic 类型的交换机
    topic_exchange = await channel.declare_exchange('topic_exchange', aio_pika.ExchangeType.TOPIC)
    print(" [x] Topic exchange declared")

    # 声明一个 headers 类型的交换机
    headers_exchange = await channel.declare_exchange('headers_exchange', aio_pika.ExchangeType.HEADERS)
    print(" [x] Headers exchange declared")

    # 关闭连接
    await connection.close()

asyncio.run(declare_exchanges())
声明各种队列
pyimport asyncio
import aio_pika

async def declare_queues():
    # 连接到RabbitMQ服务器
    connection = await aio_pika.connect_robust("amqp://guest:guest@127.0.0.1/")

    # 创建一个通道
    channel = await connection.channel()

    # 声明一个持久化的队列
    durable_queue = await channel.declare_queue('durable_queue', durable=True)
    print(" [x] Durable queue declared")

    # 声明一个自动删除的队列
    auto_delete_queue = await channel.declare_queue('auto_delete_queue', auto_delete=True)
    print(" [x] Auto-delete queue declared")

    # 声明一个排他队列
    exclusive_queue = await channel.declare_queue('exclusive_queue', exclusive=True)
    print(" [x] Exclusive queue declared")

    # 声明一个带参数的队列
    arguments_queue = await channel.declare_queue('arguments_queue', arguments={'x-message-ttl': 60000})
    print(" [x] Queue with arguments declared")

    # 关闭连接
    await connection.close()

asyncio.run(declare_queues())
利用topic广播信息
py# 创建队列
import asyncio
import aio_pika

async def declare_chat_topic():
    # 连接到RabbitMQ服务器
    connection = await aio_pika.connect_robust("amqp://guest:guest@127.0.0.1/")

    # 创建一个通道
    channel = await connection.channel()

    # 声明一个 topic 类型的交换机
    chat_topic = await channel.declare_exchange('chat_topic', aio_pika.ExchangeType.TOPIC)
    print(" [x] Chat topic exchange declared")

    # 声明并绑定多个队列
    users = ['user1', 'user2', 'user3']
    for user in users:
        queue = await channel.declare_queue(user, durable=True)
        await queue.bind(chat_topic, routing_key='#')  # 使用通配符 '#' 绑定所有队列
        print(f" [x] Queue {user} declared and bound to chat_topic")

    # 关闭连接
    await connection.close()

asyncio.run(declare_chat_topic())


# 发消息
import asyncio
import aio_pika

async def send_broadcast_message(message: str):
    # 连接到RabbitMQ服务器
    connection = await aio_pika.connect_robust("amqp://guest:guest@127.0.0.1/")

    # 创建一个通道
    channel = await connection.channel()

    # 获取 chat_topic 交换机
    chat_topic = await channel.get_exchange('chat_topic')

    # 发送广播消息
    await chat_topic.publish(
        aio_pika.Message(
            body=message.encode(),
            delivery_mode=aio_pika.DeliveryMode.PERSISTENT  # 持久化消息
        ),
        routing_key='broadcast',  # 使用 'broadcast' 作为路由键
    )
    print(f" [x] Sent '{message}' to chat_topic")

    # 关闭连接
    await connection.close()

asyncio.run(send_broadcast_message('Hello, everyone!'))

# 消费
import asyncio
import aio_pika

async def on_message(message: aio_pika.IncomingMessage):
    async with message.process():
        print(f" [x] Received {message.body.decode()} from {message.routing_key}")
        # 手动确认消息
        await message.ack()

async def consume_messages(user: str):
    # 连接到RabbitMQ服务器
    connection = await aio_pika.connect_robust("amqp://guest:guest@127.0.0.1/")

    # 创建一个通道
    channel = await connection.channel()

    # 声明一个队列
    queue = await channel.declare_queue(user, durable=True)

    # 开始消费消息
    await queue.consume(on_message)

    print(f" [*] Waiting for messages for {user}. To exit press CTRL+C")
    await asyncio.Future()  # 保持消费者运行

asyncio.run(consume_messages('user1'))
asyncio.run(consume_messages('user2'))
asyncio.run(consume_messages('user3'))
利用过期时间和死信队列实现延迟消息

py# 声明交换机和普通队列并绑定死信队列

import asyncio
import aio_pika

async def declare_exchanges_and_queues():
    # 连接到RabbitMQ服务器
    connection = await aio_pika.connect_robust("amqp://guest:guest@127.0.0.1/")

    # 创建一个通道
    channel = await connection.channel()

    # 声明一个 direct 类型的死信交换机
    dl_exchange = await channel.declare_exchange('dl_exchange', aio_pika.ExchangeType.DIRECT)
    print(" [x] Dead letter exchange declared")

    # 声明一个死信队列
    dl_queue = await channel.declare_queue('dl_queue', durable=True)
    await dl_queue.bind(dl_exchange, routing_key='dl_routing_key')
    print(" [x] Dead letter queue declared and bound")

    # 声明一个主队列,并设置死信交换机和死信路由键
    main_queue = await channel.declare_queue(
        'main_queue',
        durable=True,
        arguments={
            'x-dead-letter-exchange': 'dl_exchange',
            'x-dead-letter-routing-key': 'dl_routing_key',
            'x-message-ttl': 5000  # 消息过期时间为5秒
        }
    )
    print(" [x] Main queue declared")

    # 关闭连接
    await connection.close()

asyncio.run(declare_exchanges_and_queues())

-------------------------------------------------------------------------
# 发送消息
import asyncio
import aio_pika

async def send_delayed_message(message: str):
    # 连接到RabbitMQ服务器
    connection = await aio_pika.connect_robust("amqp://guest:guest@127.0.0.1/")

    # 创建一个通道
    channel = await connection.channel()

    # 获取主队列
    main_queue = await channel.declare_queue(
        'main_queue',
        durable=True,
        arguments={
            'x-dead-letter-exchange': 'dl_exchange',
            'x-dead-letter-routing-key': 'dl_routing_key',
            'x-message-ttl': 5000  # 消息过期时间为5秒
        }
    )

    # 发送消息到主队列
    await channel.default_exchange.publish(
        aio_pika.Message(
            body=message.encode(),
            delivery_mode=aio_pika.DeliveryMode.PERSISTENT  # 持久化消息
        ),
        routing_key=main_queue.name,
    )
    print(f" [x] Sent '{message}' to main_queue")

    # 关闭连接
    await connection.close()

asyncio.run(send_delayed_message('Delayed message'))

# 消费消息
-------------------------------------------------------------------------
import asyncio
import aio_pika

async def on_message(message: aio_pika.IncomingMessage):
    async with message.process():
        print(f" [x] Received {message.body.decode()} from {message.routing_key}")
        # 手动确认消息
        await message.ack()

async def consume_delayed_messages():
    # 连接到RabbitMQ服务器
    connection = await aio_pika.connect_robust("amqp://guest:guest@127.0.0.1/")

    # 创建一个通道
    channel = await connection.channel()

    # 声明一个死信队列
    dl_queue = await channel.declare_queue('dl_queue', durable=True)

    # 开始消费消息
    await dl_queue.consume(on_message)

    print(" [*] Waiting for delayed messages. To exit press CTRL+C")
    await asyncio.Future()  # 保持消费者运行

asyncio.run(consume_delayed_messages())
本文作者:yowayimono
本文链接:
版权声明:本博客所有文章除特别声明外,均采用 BY-NC-SA 许可协议。转载请注明出处!